Hello friends, today we will learn how to implement
conditional split task in SSIS. Before moving to the implementation part, we
should know where to use conditional split task. Lets have a look at the below
scenario.
Scenario: - I
have a table “Emp_detail” as a data source and I want to split the data coming
from the data source into smaller data sets. For example, I want to split the
source data based on condition if salary is less than 20000 then it should go
to in a different destination table and salary greater than 20000 should go to
another destination table.
To implement this scenario lets create three tables,
Emp_detail, Emp_LessSalary, Emp_GreaterSalary.
CREATE TABLE Emp_Detail](
[Eid] [int] NULL,
[Name] [varchar](50) NULL,
[Dept] [varchar](20) NULL,
[salary] [int] NULL
) ON [PRIMARY]
INSERT INTO Emp_Detail(Eid,Name,Dept,salary)VALUES(1,'neeraj','IT',10000)
INSERT INTO Emp_Detail(Eid,Name,Dept,salary VALUES(2,'akshay','Acct',20000)
INSERT INTO Emp_Detail(Eid,Name,Dept,salary)VALUES(3,'Mohan','HR',50000)
INSERT INTO Emp_Detail(Eid,Name,Dept,salary)VALUES(4,'priya','Payroll',5000)
INSERT INTO Emp_Detail(Eid,Name,Dept,salary)VALUES(5,'Ritu','Finance',8000)
INSERT INTO Emp_Detail(Eid,Name,Dept,salary)VALUES(6,'Harshit','Engg',40000)
INSERT INTO Emp_Detail(Eid,Name,Dept,salary)VALUES(7,'Amit','Planning',30000)
We will create “Emp_detail” table using above script and
insert few rows into it, now we will create two more tables using below
scripts.
select * into Emp_LessSalary
from Emp_detail where
1=0
select * into
Emp_GreaterSalary from Emp_detail where 1=0
Now its time to create the SSIS package to implement
the conditional split task.We will follow below steps.First we will drag and drop one data flow task into the
control flow region as shown in the below screen shot.

Double click on the "data flow" task that will open data flow
region. Now we will add “OLEDB Source” into the data flow region(as shown in
the below screenshot).

We will configure the connection manager for “OLEDB Souce”
by double clicking on it(you can refer my earlier articles to see how to
configure connection manager for “OLEDB Source”.
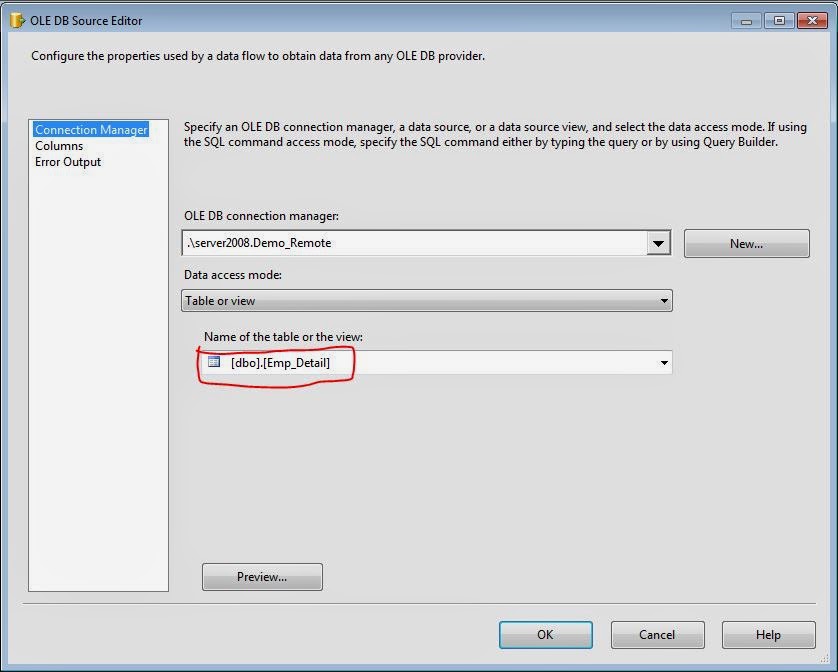
I have configured the connection manager for the “OLEDB
Source” and selected the “Emp_Detail” table as a data source as shown in the
below screenshot.
Now we will add “Conditional Split” task to the data flow
region as shown in the below screenshot.

We will right click on the “Conditional Split” task and
click on “Edit” menu that will bring a new screen to us(refer the below
screenshot for reference).

In the above screenshot, we have three sections, first
section contain the variables and columns that we are receiving from the “OLEDB
Source”. Second section contains all the inbuilt fuctions those are available to
apply in the “Conditional Split” task. In the third section, we define the
conditions.I have defined two conditions and given “Output Name”(LessSalary and
GreaterSalary).In the condition column, I have put the condition,we will click
on “OK” button to close the screen.
Now we will add “OLEDB Destination” task to our package as
shown in the below screenshot.

We will connect the green connector of the “Conditional
Split” task with the “OLEDB Destination” task. As soon as we connect the connector
with the “OLEDB Destination” task, a new pop up window will come up(as shown in the
below screenshot).

In the pop up window we have three output shown in the
“Output” combo box.
We need to understand these three output options.
GreaterSalary:- This will contain the rows those will
qualify the condition(Salary >20000)
LessSalary:- This will contain the rows those will qualify
the condition(Salary <20000)
Conditional Split Default Output:- Suppose I have 10 rows in
the source data set and 4 rows qualify the condition(Salary>20000) and 4
rows qualify the condition(Salary <20000) then rest 2 rows from the source
data set will come under Conditional Split Default Output.
Now we will select “GreaterSalary” in the output combo box
and click on “OK” button.

Now
we will take one more “OLEDB Destination” task and connect the “Conditional
Split” task with the second “OLEDB Destination" task(as shown in the below
screenshot).

In the above screenshot we can see that our both “OLEDB
Destination” tasks are showing error sign(red cross).The reason behind these
errors is that we haven't specified the destination table yet.To remove these
errors, we will right click on the any of the “OLEDB Destination” task and click
on edit menu, that will bring a new screen to us(as shown in the below
screenshot).

You can see in the above screenshot, I have specified the
“Emp_GreaterSalary” table, in which I want to import the rows which will
qualify the condition(Salary>20000).In the mappings tab, we can map the
source and destination columns.
We will perform the same activity for the second “OLEDB
Destination” task to remove the error but this time we will select the
different table “Emp_LessSalary”.

We can see in the above screenshot that all the errors have
been removed.Now we are ready to run our SSIS package.
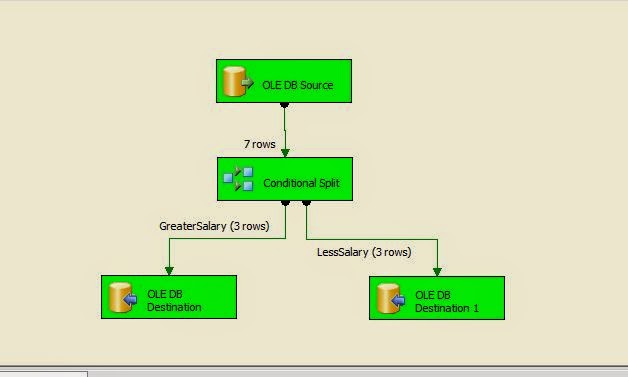
In the above screenshot,we can see that 3 rows has been imported
to each “OLEDB Destination” tasks but we had 7 rows in the source table. So 1
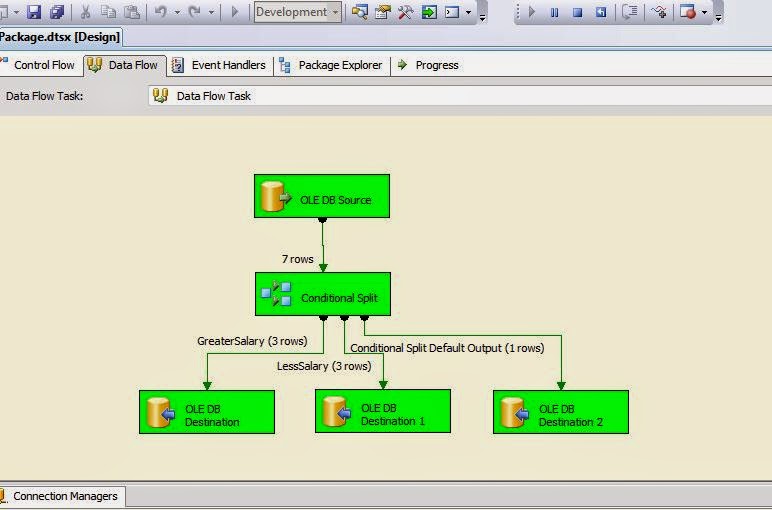
row is missing, if we want to get that row we have to a use the “Conditional
Split Default Output” as output(I have already explained this above) and take
one more “OLEDB Destination” task and connect with the “Conditional Split”
task(as shown in the below screenshot).
I hope you will find this article useful for you. Please
feel free to ask any question related to this article.
No comments:
Post a Comment